Monday, June 11, 2012

New Work

One of the exciting groups I am honored to be part of is the Fiber Artists of Hope....which began with the  original ObamaMamas. We've grown in number, organization, and passion for issues of social justice.

We were electrified by Trayvon Martin murder, and the call went out to see if we could make a rapid response in art.  I didn't think I could do it, but I kept being haunted by the image of this kid in his hoodie, heading home, and ending up dead.  I actually asked my darling hubby to put on his sweatshirt with the hood up and let me take some photos, and even he (the sweetest old face in the world) looked just a little sinister.  So I put together some faces from the internet, made hoodies for them, and came up with a 9-patch format:


                               People of the Hood [about 36 " square]

I'll bet you can recognize at least some of these people, but in case you can't, check out the Companion Piece:


Thanks to Google, I was able to locate not only decent black&white photos, but bits of the writing of each of my "hoodie" people.  My favorite quote is the one by Lincoln.  In case you can't make it out on the chart above, here's the best part (IMO):  "When the Know-Nothings get control, it will read 'all men are created equal, except negroes, and foreigners, and Catholics.'  When it comes to this I should prefer emigrating to some country where they make no pretense of loving liberty, where despotism can be taken pure, and without the base alloy of hypocrisy."  Pow!


The name of the group exhibition is American Spring, and it's being organized by the wonderful Michelle Flamer from Philadelphia.  One of the first venues for this show will be the Facing Race Conference in November, in Baltimore.  I'll be there.

SAQA Challenge:  I'm Not Crazy

I worked very hard to get this done in time to enter.  It was a labor of passion, actually, and the images came to me fully formed.  The work began by me digging out an old essay I'd written in a weekend "creative writing" workshop, about my own battles with depression .  It divided nicely into 9 paragraphs...and, la!...another nine-patch.  I'll give you the whole-piece picture first, and then show it to you block by block, hoping you'll be able to read the words.

 
                Not Just Blue   [42 x 52]


Boy, oh boy....I hope this gets accepted!  Perhaps someone will find something helpful in it.

UFO* no MO'


There were so many *Unfinished Objects hanging out in my studio, and the positive energy roll I was on from the Blues quilt just swept me into doing something with them.  A handful went right into the trash! But the rest, I decided, I would work on and finish.  

So, here's a parade of some of my New/Old Work.  Enjoy.  Buy.  Or not.


        Cottonwood   (11 x 17)


    Skin Beautiful Skin    (12.5 x 12.5)


     Painted Flowers      (10 x 13)


     Analogous Colors: Blue      (7.5 x 7.5)


      Analogous Colors: Red   (7.5 x 7.5)


close up


    I've Always Had A Crush on Modigliani    (16 x 21)


This Is Not A Still Life    (22.5 x 36)


Tuesday, March 27, 2012

Quarterly Report: Update

One day in January a poem fell out of my fingers and onto my keyboard.  It's the first poem I've written in 50 years, so I thought I'd share it with you.


                        Studio Thoughts

In my messy studio, I am master of little.
Invisible mistifuse disappears and reappears at will.
Scissors dull and needles rust for no reason at all.
Bits and bolts of fabric dance about while I sleep, merely to confuse me.
Thread, carefully wound, unwinds itself.
And the dust bunnies are mating.
Why then do I love it so?
Because it's mine.
Because time holds still there.
And sometimes, when I least expect it, I make something  beautiful.


Also, in January, my Wednesday Critique Group hung a large show in an unusual place. The Pinnacle Center is a gigantic office building in Tysons Corner (northern VA) that is dedicated to showing art, most of it hung in huge windows in the corridors off the main hall.  Here's a photo showing us measuring the size of the windows....
  and above is Donna Radnor and her iPad, to give a sense of the scale.

Apparently, the concierge in the main entry says that they are getting a lot of nice comments about the quilts from people coming through.

Leaf Time

I took a little half-day class at Capital Quilts, learning how to work with a new product: InSpire, which is more rigid that TimTex, but is moldable when heated.  We made little pieced leaf bowls.  Here's a photo of the first step, when the backing is fused to the InSpire, and the bits of fabric are laid out inside the drawn edge of the leaf:

Yep; that's my black and white leaf, but the hands are those of Alison Zacharkiw, the teacher.  In the next photo, she's demonstrating free-motion drawing of the veins in each segment:
And then, zig-zagging over the junctions where the pieces meet (actually this is a tiny bit of movie, and you can hear the needle noisily punching through the stiffener):


We couched embroidery floss down the center vein of the leaf. Then, we carefully cut around the shape, and did a zig-zag around the perimeter (needle going on the fabric and then off the fabric to make the bound edge) several times 'round.  The final step was to heat the leaf with an iron, and then quickly press it to an inverted drinking glass, pleating the leaf with our hands to give it shape. 

Here's the final piece, front view and back view:


I so enjoyed the process that I made a whole bunch of them; here's a few:

The Graphic Memoir
     I had no idea how popular "graphic novels" were becoming, but I saw that Politics and Prose (favorite DC bookshop) was advertising a course in producing a graphic memoir, taught by Janice Shapiro, a published artist/writer from NYC, so I signed up in February. I discovered that P&P has one huge wall just devoted to graphic novels.
     Janice shleps down to DC once a month to teach us how to do one ourselves.  At the end of 6 months, we should have produced a small book on some aspect of our own lives.  The story I've chosen is "It All Began With Georgie".... how I found my way to quilting (which you can see if you go to the very first entry in this blog!).
     We're learning storyboarding, sketching, working with india inks with pen and brush on bristol board, lettering, use of perspective, etc.  Since we are the central character and must be recognizable in different pictures, seen from different angles, we had to practice drawing ourselves, first.  Here's a page of "me's":
(Too bad I just had my hair straightened?!) Anyway, I don't know how, but I'm sure that some of what I'm practicing in this course will find its way into my quilt art. Scott McCloud has written several paperback books on making comic art, if you are interested in this topic, and a very poignant example of this art form can be seen in the 2-volume book, Maus, on the Holocaust.


Acceptances

        
The Fence was accepted at Black Rock Center for the Arts for their annual fiber art show.
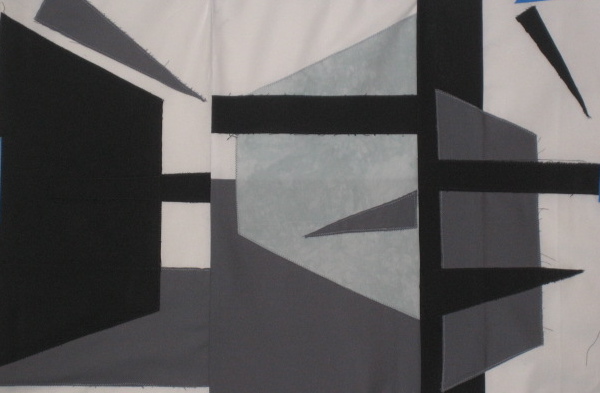
Graphic #1 will be at FAVA's Biennial Exhibition of Contemporary Quilts:  The Artist as Quiltmaker, May 13-July 29, 2012.
Dreaming of Spring is hanging at the Pinnacle Gallery (above).

Gotta Dance is hanging in my son's new office waiting room (The Body Image Therapy Center)!

And my SAQA auction piece, Yes We Can, has been sent in for early admission.

More Classes
       I signed up for an all-day course in AirBrush painting at a local art store at the end of February.  It was fun, but I could only take the first part of the day, planning to take the second part on the next class cycle.  Here's an example of one piece I played with:


By the time I left the class, I had itchy eyes, a cough, and several "Black" sneezes.  There were 12 of us (plus teacher) in a closed room, arrayed around a rectangular table, each spraying away with black airbrush ink. No one wore even a mask, including the teacher.
As the cough lingered, I wrote to Susan Shie (airbrush artist extraordinaire) about her process and the kinds of paint she uses. Her letter back to me was a powerful wake-up call, and I want to share it with you here (with her permission), in case you're ever tempted to try airbrush work:

"This is totally shocking... I wear a very serious respirator with filters on it that catch particles and fumes both, and pre-filters over the filters, when I airbrush. I also have a serious exhaust fan built into the room's window. My respirators are 3M 6000 models....these are latex-free respirators. Paper masks are not enough protection.

I would never, ever airbrush with more than two people working at once, even with them wearing respirators. Respirators, not paper masks.

My paint is water based airbrush paint, but the only difference between that and ink is the thickness. It's all about pigments, which are heavy metals, all of them, and about the synthetic compounds that bind the paints, inks, whatever.

It doesn't matter what you're putting through the airbrush. As you see, it got into your lungs, and your body is desperately trying to expel it.....it's all toxic....The instructor is getting the worst of it, teaching over and over, but each student is terribly abused by such irresponsible behavior. I would never, EVER allow one person to use an airbrush unprotected,not even outside! The health problems are not just risks, but are givens."

Postscript: I printed out a copy of Susan's letter and took it to the store manager where the course was given. She was very angry, glanced at the letter and put it down on the table. Didn't she want to keep it? No. Or share it with the (young) teacher? No. She did not step up to the problem in any way.

So, wanting to make something useful of this experience, I'm sharing it here.  If even one person can be spared the experience that I had, I will be grateful.  Pass it on, as a rumor!

     I had a better experience taking a class with Saaraliisa Ylitalo on JOOMCHI, a Korean art of making textured papers. Here's the beautiful Saaraliisa (no, I'm not misspelling...it's a Finnish name):
The process begins with sheets of mulberry paper, painted thickly with water, then layered with 2 or more sheets of tissue or other paper:

Repainted with water and then rolled out to remove air bubbles:


Then scrunched up into a ball to be pressed as the ball is passed from one hand to another.  For 40 minutes!


What's happening is that the paper fibers are being "felted"; the paper is unrolled, scrunched again in a different direction, and then refelted (plus two more scrunchings).  Oy!

When I got mine home, I ironed it out, and here's my joomchi paper, hope you can see the texture as well as the bits of colored paper sandwiched between the other sheets.  It shrunk to about 
8"x 11", and has a quality almost like fabric.  


What I'm working on....
     I'm making some progress on my dancing rubber chickens, altho' there's a lot more work to do:


       I've been drawing and photographing hands for some time, and am starting to make tiny hand quilts, which may find their way into a large piece later.  Here's a few:

      But more than anything, the thing I'm most proud of...and exhausted by...is a total reorganization of my studio.  It all started when I took my Bernina out for its biennial cleaning, which led me to clean my sewing table, which lead to cleaning the chair, which led to taking out my messy stash of blue fabrics.....and, you can see where I'm going.  It's taking ALL my free time to keep at this, and I have 2 enormous bags of give-away fabric, but look --- just take a deep breath and look -- at this shelf!!!

Ahhhhhhhhhhhhhhh.

Wednesday, December 28, 2011

End of Year Wrap-up


September brought a class with the lovely Terry Jarrard-Dimond; we worked on Shape...just abstract shapes.  It wasn't easy, but it was interesting to see what came out of the group's invention.  First, we worked with paper (black, white, neutral).  Here's what I came up with:


(Ignore blue tape holding the top).  Then we had to enlarge significantly, and sew the design in black, white, and a neutral fabric:


Then, we were encouraged to make it again, using one more color.  A next assignment was to design  shapes with string (n.b., not my hands) :


And finally to make a composition of shapes that arose from string exercises.  Here's my paper piece, which reminds me vaguely of Hebrew letters and African kuba designs:


Toward the end of September, we played host to grandson Ami (2 y.o.) while his parents went to Europe to give academic talks.  Here's Ami:


We borrowed toys from several friends who are grandparents, bought an outdoor plastic basketball set in a huge box, got lots of his favorite foods stocked in, borrowed kid movies from another grandson, and made up a few activities: e.g. I found an old canvas frame in the basement and covered it with batting. Then I made a dishpan full of color (all kinds of odd shapes and a few letters), so we had "art" most days. We also had "hammering": got a bag of extra long golf tees in pretty colors and cut big squares of foam to 4" thick, and he had fun just hammering away.  But I'll bet you already know what his favorite toy was.  Yep.  The big box.
    "Where are you, Ami?"
    "I'm hiding..........in the box."
It also made a great speedway for our (recently acquired) collection of matchbox cars.

Another thing I did was to make Ami a new Minky snuggly; I'd been told his old one was looking rather ratty.  Just in case you haven't made one, I'll show you how.  First you go to the dime store and buy a half yard each of pretty decorative ribbons (avoid the wired ones, or remove the wires).  Then, get a yard or less of Minky.  (I've always made these of white Minky, but it's getting hard to find these days.)  Cut out two squares (or rectangles) of Minky, the same size.  Put one face up and pin ribbon loops around the edges as shown here:


Play with the design till you're happy; I've found that the more the variety in ribbons, the better.  Then place the other square right side down on top of the first.  Pin carefully around, and then sew, leaving about a 5-6" opening on one side.  Remove pins, turn inside out, and close the opening by machine or hand stitching.  Minky hides all irregularities!

Here's a picture of Ami's snuggly pillow, and two little ones for brand-new babies on our block:


October was a month I devoted to finishing off UFO's.  Here's a few:


EcoGirl: based on a photo I took in London, where a group of ecologically mindful people were putting on demonstrations.  This lady was sewing without electricity...one hand turning the machine's wheel, the other moving the fabric through.  This is a small quilt, about 12 x 14.


Graphic I: You might remember an earlier post of this piece.  I took off all the little silk squares with beads in the black center, and broke up the long green vertical with rows of double beads, a small on top of a large.  I think these changes helped make the graphic more clear and bold (nod to my wonderful SIG-SAC critique group).  This is a larger quilt, about 20 x 35.


November began with another on-line course with Pamela Allen.  This one was about working in a series.  Each student picked a subject matter (e.g., castles, weddings, etc); I chose still-life.  For the first assignment we were to select a piece of art which had a color palette we liked and make a quick fabric "sketch" of it.  As you can see, I loved the Matisse painting of the red room, and here's my quick sketch in fabric:


The real part of this assignment, was to make a new quilt using that same color palette. I made a sketch of a still-life that would use many of the same colors:


But look how the final piece came out, with Pamela's guidance:


The second assignment was to do a cubist design.  Now, I'd decided that I wanted to put some of my collections of silly animals into my still-lifes, so this piece began with my Big Fish found in a folk art store in Warsaw, Poland:


Here's how he looked in the fabric piece...still not finished:


The third assignment was, I believe, to do an abstract design.  Searching for inspiration, I gathered some of my silly animals into the kitchen and started making pictures......e.g.,


but no matter how I played with arrangements, it just looked like a bunch of "stuff."  So I'm sitting there, playing with my rubber chicken, twiddling his legs to make him dance, and it suddenly hit me.  Fageddaboutit... no still life....a dancing chickens piece!  I'm gradually working at this and I think it'll be really cute when it's done, but here's a glimpse of the first iteration:


I ended up being so hopelessly behind in this course, that I never did do a 4th piece, although Pamela was exceedingly gracious in allowing us to submit later, even much later.  I really love this teacher, and highly recommend her courses!

December: what a busy month for everybody.  I did manage to finish off a piece I've been noodling on for much of 2011.  I'd collected a batch of scraps of yellows and related light colors, and I made up a bunch of varied blocks...just improvisationally...whenever I felt like just "making something."  At some point I began to put some of them together into larger units, and eventually it was large enough to form a background -- 30-some inches on all sides.  So, OK, now I have an interesting and subtle background....what am I going to put ON it???  Lots of drawings later, I finally came up with a spring themed idea; in fact, I'm calling it Dreaming of Spring:


Here's a detail shot:


Mid-December, Dave and I went off to San Francisco for a holiday.  We saw lots of art, lots of friends, lots of wonderful sights, and on our last day, we had the best coffee we'd ever had:


So if you get to Filmore St. in 2012, stop in at Jane and ask the barrista to make you a cappacino.
Happy New Year!